
In the past, it would have been unthinkable to install your own home alarm system. The process would have required a professional technician on hand to get things up and running. However, many modern-day smart home alarm systems have taken the complexity out of installation. As such, doing it yourself can be a quick and easy job. The following article takes you through that process in 6 simple steps.
Step 1: Choose Your Smart Home Alarm System
Smart home alarm systems are growing fast in popularity and there are many makes and models to choose from. Before deciding which system to invest in, it’s important to define exactly what you want it to do. Options range from simple setups that include motion detectors, sensors and a hub to complete systems that incorporate CCTV, lighting, locks, water and smoke sensors, and sirens. If you’re planning to opt for one of the more complex systems, you’ll likely need some outside help with installation.
Step 2: Connect Your Smart Home Alarm System
Once you’ve chosen your smart home alarm system, it’s time to get it connected. There are three basic points your system needs to be connected to:
- The power supply
- The internet
- Your smartphone/device
To connect it to the power supply, you simply choose where you want to place the hub and then plug it into the nearest socket. The hub is the piece of equipment that communicates with the other elements in your smart home alarm system. Along with a mains power connection, the hub will have a backup battery that kicks in should a power outage occur.

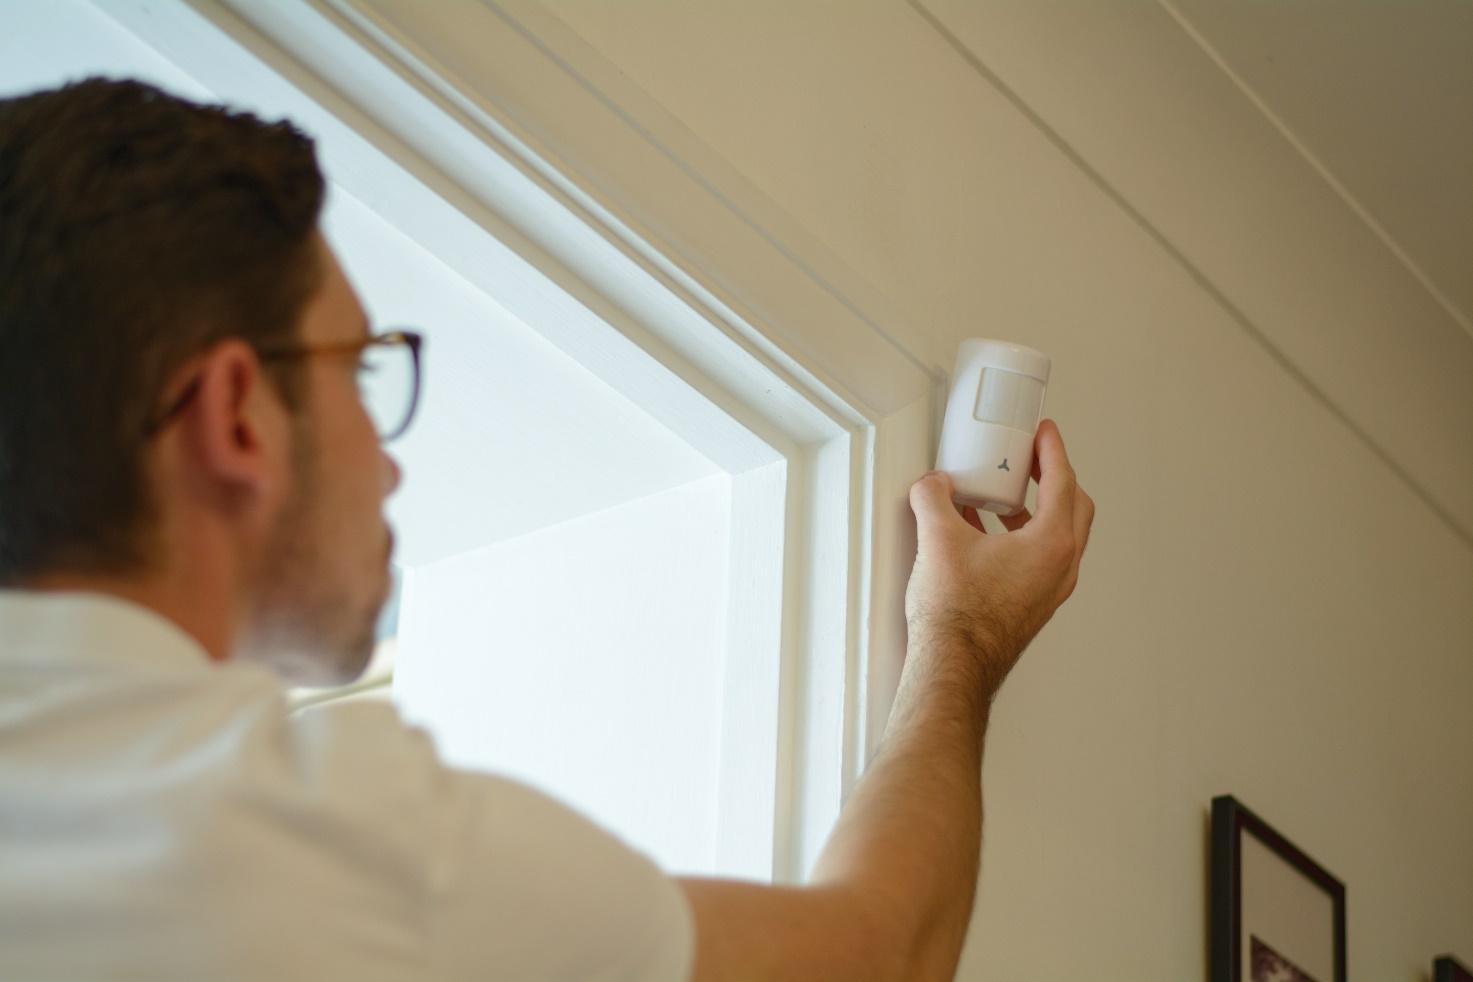
Step 3: Position The Sensors
Once you’ve found the perfect spot for your hub, you need to position the sensors. There are two main types of sensor:
- Motion detector sensors
- Door and window sensors
As the name suggests, a motion detector sensor picks up movement in your home. These are usually placed in the upper corner of a room to catch unusual or unexpected movement in a specific space. Door and window sensors detect when a door or window is opened and can also be placed on cupboards. Both types of sensors trigger an alarm when activated.
Step 4: Download The App
Smart home alarm systems come with an app that can be downloaded onto your smartphone or other smart device. Apps can usually be found in the iOS App Store or Google Play Store depending on your device. You will need to register your system on the app and complete the verification process. This might involve receiving a verification code via email or text message to activate the app. Once this step is complete, you can set up your home on the app by entering your location and the rooms in your house.
Step 5: Connect To The Internet And Pair Your Devices
Your smart home alarm system hub will need to be connected to the internet to communicate with the app. Check the user guide for instructions on how to do this on your specific alarm system. It will usually involve connecting to the WiFi and pairing the devices. Your app should have an option to search for and add devices, which allows you to connect the hub to both your WiFi and your app. Once the hub is connected to the internet and the app, you’re ready to go.
Step 6: Test Your Smart Home Alarm System
Once everything is up and running, it’s time to get familiar with your new smart home alarm system. The app allows you to control the system no matter where you are. This means you can check whether you remembered to switch it on before leaving home - and if you didn’t, you can do so remotely. There are various modes to choose from, which include:
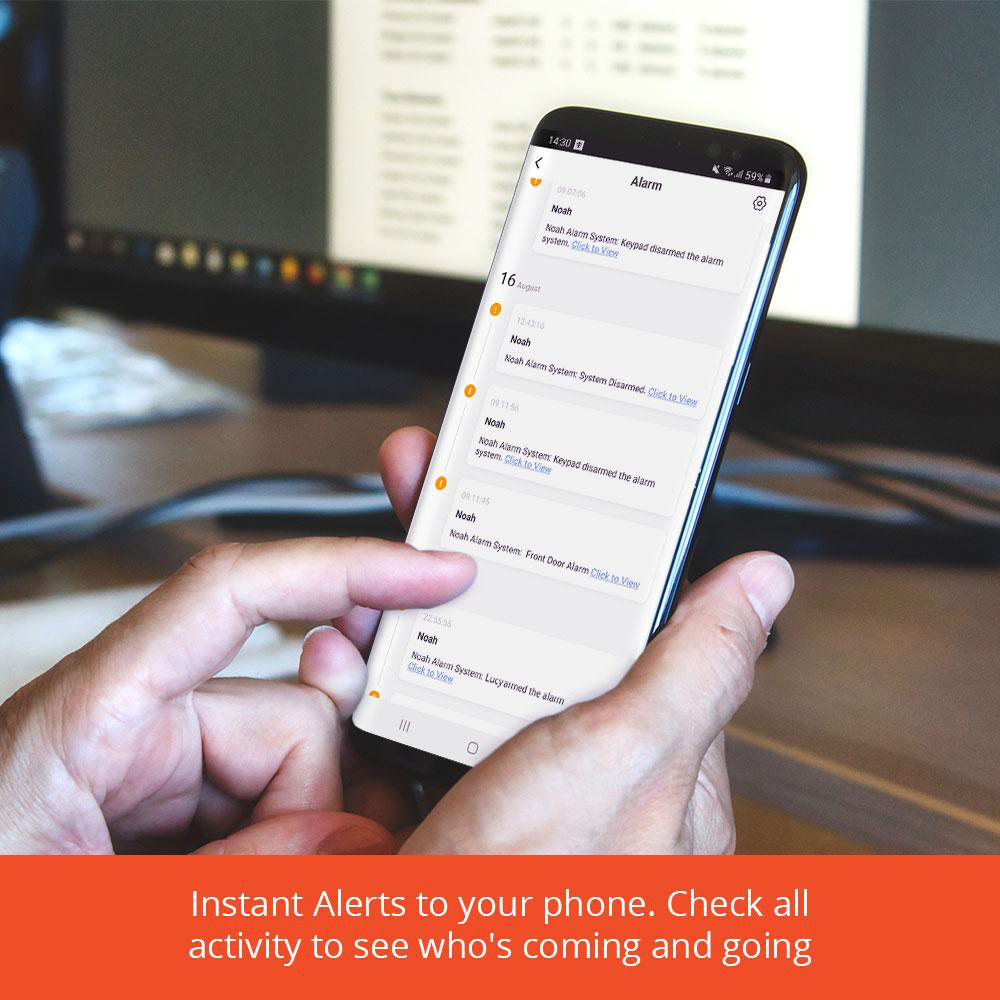
Armed
This is the mode you’ll want to use when you go out. All sensors are on active alert and will trigger an alarm if activity is detected.
Disarmed
When you arrive home you’ll probably want to switch your smart home alarm system to the disarmed mode. All sensors will then be deactivated and you can walk around your house without triggering an alarm.
At Home Mode
This mode allows you to manage different parts of your house separately. Sensors in the At Home zone are deactivated while those outside it are not. This is useful when you go to bed, for example. In such instances, you can choose to have the upstairs sensors deactivated while the downstairs ones remain active.
SOS
This mode is for emergencies and allows you to trigger an alarm at the touch of a button no matter which mode is activated on your smart home alarm system at the time.
Play around with the app and test out various settings so that you know what to expect and how to turn various modes on and off when needed. Once you’re familiar with the system, you’re ready to go!